How to Make Custom Hand-Painted Bookmarks
A Step-by-step tutorial for gifts and personal use
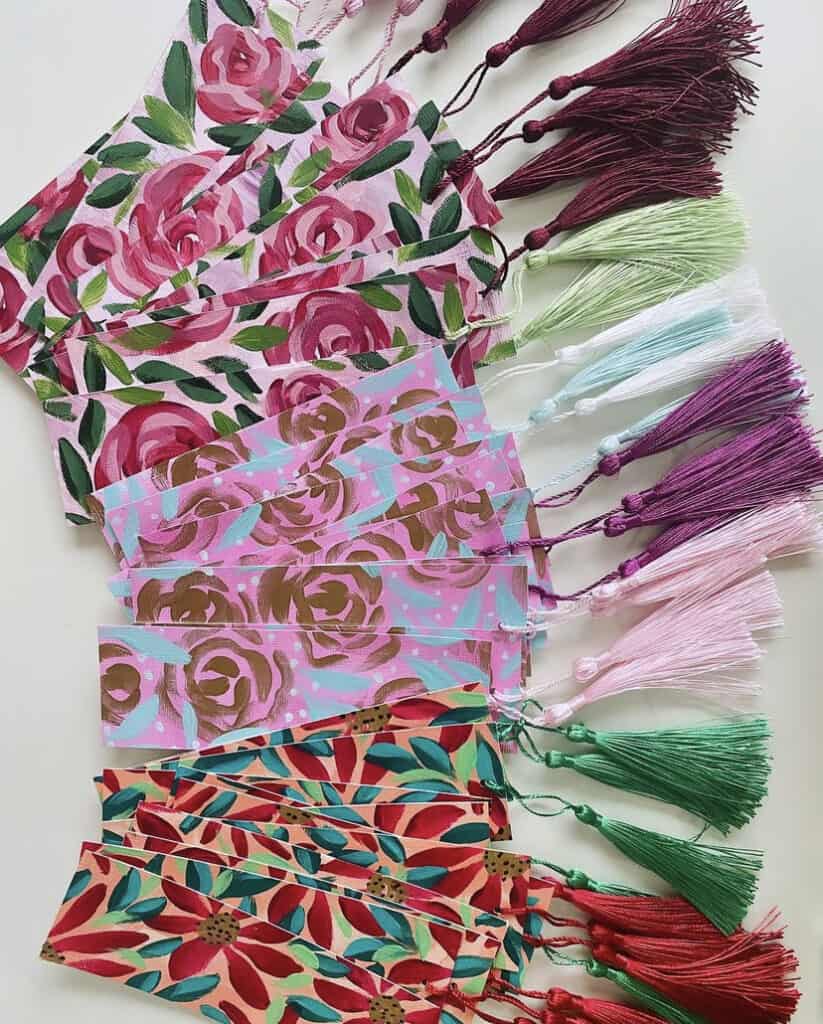
I first created bunches of these when I had an art show at a local library here in Florida. I mean, how perfect is a bookmark as a business card at a library!? They were so well received and an absolute joy to create. This method allowed me to create a bunch all at once, so it was not a huge time investment.
These DIY hand-painted bookmarks are a charming and personal way to mark your place in a book or give thoughtful gifts. With just a few supplies and a bit of creativity, you can make unique, beautiful bookmarks. Follow this guide to create your own!

how to make hand-painted bookmarks
1. Gather Your Supplies
Before you start, ensure you have all the necessary supplies below. I’ll be linking you directly to my favorite products for this project. Please note: links are all affiliate links.
- Paper: Strathmore Acrylic Paper (12×12 inches) or any heavy, thick paper suitable for painting
- Art Supplies: Pencils, pens, crayons, charcoal, or any sketching tools you prefer.
- Paint: Acrylic paint is the way to go for this project. Personally, I love to use fluid acrylic paints. They are more soupy than heavy body acrylics and glide beautifully for applying. Any acrylic paint will work beautifully! Leftover house paint would work too. 🙂
- Finishing Spray Varnish: Optional, Any Spray Fixative or Liquitex Water-Based Spray Varnish is my personal go-to
- Mod Podge: Optional, but can be used for adhering scrapbooking paper to the back
- Tassels: Optional, for decoration but a must in my book 🙂
- Plastic Bookmark Sleeves: Optional, but will certainly make them last longer. These specific ones I recommend.. they are the perfect size and I had quite the time finding well made ones that fit well!
2. Prepare Your Paper
Start with a 12×12 inch sheet of your chosen paper. This size is perfect because it allows you to create 12 bookmarks (2×6 inches) from a single sheet. You don’t need to cut the paper yet; you’ll do that after painting.
Tip: You can also adhere a patterned scrapbooking paper to the back with Mod Podge if you want an extra layer of design on the backing. You could also just use scrapbook paper and skip the painting but I must say this is a little less fun! 🙂
3. Choose a Theme and Sketch Your Design
Decide on a theme for your bookmarks—anything from floral patterns to abstract designs or patterns. Keep it simple! You’re going to be so impressed with how beautiful your bookmarks can be! Lightly sketch your ideas on the paper using pencil, pen, crayon, or charcoal if you’re nervous about sizing. Remember, the goal is to keep the designs relatively small and playful! Experiment with different sized flowers or create variation if you like. There is no wrong way to do this, I promise!
Tip: Don’t worry about perfect placement or precision. Embrace the imperfections, as each bookmark will be unique and charming in its own way.
4. Paint Your Bookmarks
Paint your designs directly onto the 12×12 paper. Use acrylic paints for faster drying and vibrant colors. Keep your painting process loose and spontaneous—there’s beauty in imperfections! Allow yourself to get lost in creation mode. If a color comes to mind, grab it! Don’t overthink it.
Optional: You can choose to paint the back of the bookmarks or for added texture or design, adhere a 12×12 scrapbooking paper to the back with Mod Podge before painting.
Tip: Use a blow dryer to speed up the drying process if you’re in a hurry or just excited!

5. Varnish to Protect
Once your painting is completely dry, apply a finishing spray varnish to protect your artwork. I recommend a spray fixative or Liquitex Water-Based Spray Varnish for a non-toxic option. Let the varnish dry fully before moving on.
If you’re painting in acrylic, you can totally skip this step.. especially if you plan to sleeve them.
Tip: This step will help your bookmarks last longer and maintain their vibrant colors.
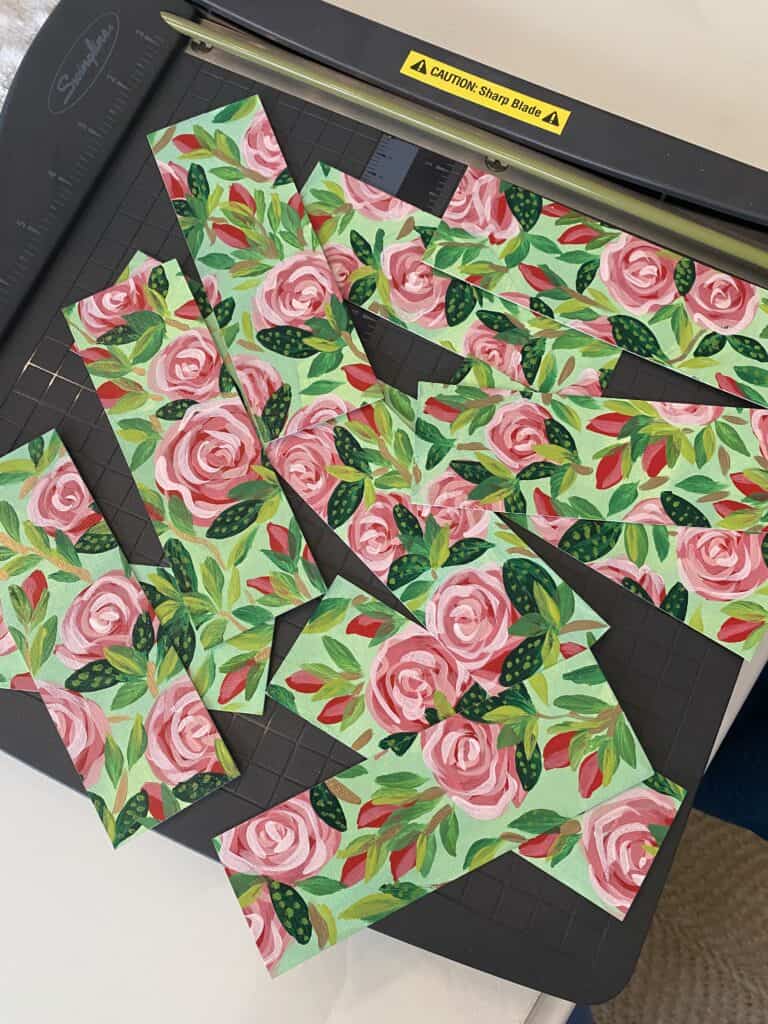
6. Cut Your Bookmarks
After the paint and varnish are completely dry, cut your paper into 2-inch strips across the 12-inch side of the sheet. Then cut each strip to a length of 6 inches. Alternatively, you can cut the sheet into two 6×12 inch sections first, then cut each section into 2-inch strips.
Tip: Mark your cutting lines on the back of the paper with a ruler for more precise cuts if you’re using scissors.

7. Added Flair & Personalization
Attach cute tassels to the top of each bookmark for a decorative finish. You can also personalize the bookmarks with names or add charms to the tassels for extra flair.
If you choose, slide your bookmarks into the protective plastic sleeves to ensure they can be enjoyed for years to come!
Tip: These hand-painted bookmarks make great gifts for friends, teachers, and more!

Creating hand-painted bookmarks is a delightful craft that combines creativity and practicality. Everyone can use a bookmark! Experiment with different designs, colors, and themes to make each bookmark unique. Enjoy the process and have fun making these personal touches!
When you make some, I would LOVE to see them! Please consider tagging me on instagram @bonniesorsbyart and I would be happy to share your creations!
Art As Therapy: A Powerful Tool for Healing
Art as Therapy: A personal Reflection on this powerful tool for healing Have you ever…
What Your Venus Sign Says About Your Creativity
Venus and Creativity in Astrology If you’re exploring astrology for creativity, Venus is one of…
Why Your Creativity Feels Blocked—And What to Do About It
Why Your Creativity Feels Blocked And What to Do About It Do you keep finding…

