How to Choose the Right Camera For Beginners

You’re probably here because you asked what camera to buy and instead of getting a clear answer, you ended up with ten tabs open and more confusion than when you started.
I’ve been enjoying photography for over 15 years across portraits, landscapes, and commercial work, and I can tell you most people don’t need a better camera. They need a better understanding of what actually creates a beautiful image.
The industry will push bodies, specs, and megapixels because that’s easy to market. What actually shapes your photos in a real, visible way is much simpler.
It’s your lens, your settings, the lighting, and your eye.
“Light makes photography. Embrace light. Admire it. Love it. But above all, know light. Know it for all you are worth, and you will know the key to photography” – George Eastman
If You’re Buying Your First Camera, Read This First
If you’re overwhelmed and just want someone to make this simple, you’re in the right place.
I’m going to walk you through what actually matters so you don’t waste money, but if you’re already over it, scroll to the bottom where I’ve laid out straightforward camera and lens setups for each brand that you can confidently choose from.
Camera Brands Matter Less Than You Think
I shoot Nikon, but I’m not loyal to it in a way that would make me recommend it over everything else.
At this point, Canon, Sony, Nikon, Fujifilm… they are all producing excellent cameras. You are not going to “ruin” your photography journey by picking the wrong brand. I typically recommend you go touch and feel some in a store somewhere and see what brand feels *good* in your hands. I’m sure some grumpy old photographers may not agree with this… but it really can be that simple.
What matters more is picking a system you can grow into and then building your lens collection intentionally over time.
Why Lenses Matter More Than Your Camera Body
Your camera body is something you will likely upgrade at some point.
Your lenses are what you build around.
They shape:
- how your image looks
- how much light you can work with
- how your subject separates from the background
A strong lens on a modest body will outperform a weak lens on an expensive body in most real-world situations.
It’s also a lot easier to upgrade your camera body later than it is to rebuild an entire lens collection once you’ve invested in it.
Let’s Talk Focal Lengths (Because This Is Where People Get Stuck)
This is where I want to open it up beyond just one recommendation, because there isn’t a single “best” lens. It depends on what you want to photograph and how you like to shoot.
Also, when we talk about focal lengths like 35mm or 50mm, we’re referring to fixed lenses with no zoom, more like the old Kodak cameras where you move your body to frame the shot instead of turning a dial.
35mm: The Everyday Lens
A 35mm is one of the most natural, versatile focal lengths you can start with.
It’s great for:
- everyday life
- travel
- environmental portraits
- storytelling
On a crop sensor camera, it will feel a little tighter, closer to a 50mm, which is still very usable.
50mm: Beautiful, But Can Feel Tight Indoors
A 50mm lens is known for that classic portrait look, and generally are quite versatile too.
It gives you:
- strong background blur if you want it
- clean subject separation
But indoors, especially on a crop sensor camera, it can feel tight fast. You will find yourself backing into walls trying to get the shot.
85mm: Portrait Magic
If portraits are your thing, an 85mm is hard to beat.
This is where you get:
- that really soft, dreamy background
- flattering compression
- a more polished, professional look
It’s not a general-use lens, but it’s incredible when used for the right purpose. An 85 really shines for portrait work.
Zoom Lenses: Flexibility When You Need It
24–70mm: The “I Don’t Know What I Need” Lens
This is a staple for most photographers for a reason.
If I don’t know what I’m walking into, this is what I grab.
It works for:
- events
- weddings
- travel
- gardens
- general shooting
It gives you range without constantly switching lenses, and that flexibility is incredibly valuable.
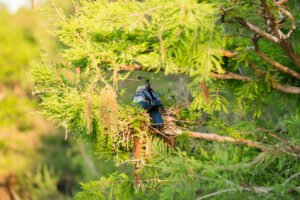
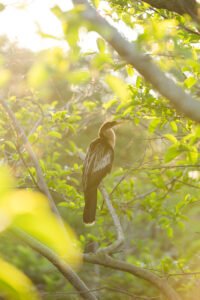

70–200mm: When You Need Reach
This is where things change.
If you’re trying to photograph wildlife, birds, or anything at a distance that’s not a landscape, your 35 or 50mm is not going to cut it.
I’ve shot at Wakodahatchee Wetlands with my 70–200mm and still felt like I could barely reach some of these birds.
That should give you a sense of how quickly distance becomes a factor.
A Simple Way to Build Your First Setup
If budget allows and you want something that can grow with you:
- One prime lens (35mm, 50mm, or 85mm depending on your interest)
- One versatile zoom like a 24–70mm
- A longer zoom like a 70–200mm (or bigger) if you’re interested in distance or wildlife
That setup covers a lot without overcomplicating things.
You don’t need it all at once, but this gives you a direction and an idea of a well-rounded camera bag.

Crop Sensor vs Full Frame, The Simple Explanation
Full frame simply means a larger sensor.
That gives you:
- more background blur
- better low light performance
- more flexibility overall
Crop sensor cameras are:
- smaller
- lighter
- more affordable
They also make your lens feel tighter. A 35mm will feel closer to a 50mm, which just means you’ll stand a little farther back.
Both are capable of producing beautiful work. You are not locked out of good photography by choosing one over the other.
Forget Megapixels (Seriously)
Unless you are printing very large fine art prints, megapixels are not what’s holding your work back.
What matters more:
- how you use light
- how you compose
- how your lens renders the scene
You’re Not Married to Your Gear
Photography gear is expensive, and that’s part of what makes these decisions feel heavy.
The good news is that if you take care of your equipment, it holds value. You can resell it, trade it, and evolve your setup as you grow.
You are not locked into your first decision forever.
Outgrowing your gear is actually a good sign. It means you’re improving.
You Can Rent Before You Commit
A lot of people don’t even realize this is an option.
If you’re feeling stuck between lenses or unsure what will work for you, rent it.
Use it for a weekend, take it somewhere you’d actually shoot, and see how it feels in your hands.
You’ll make a much more confident decision after that.
Why Your Photos Don’t Look How You Want Yet
Most people know what they want their photos to look like.
They just don’t know how to get there.
That usually comes down to:
- your lens choice
- your settings (ISO, aperture, shutter speed)
- and how you edit
Editing is a huge part of your style, and it’s something that evolves over time. If you’re exploring that side of things, I have a full post on finding your photography style with Lightroom presets that walks through how to experiment with different looks without feeling stuck.
My Camera Timeline (and What Actually Made a Difference)
I didn’t start with anything fancy.
My first camera was a Nikon D3000 that I bought on eBay around 2009 or 2010. It came with the standard 18–55mm kit lens, which felt exciting at first, but I outgrew it pretty quickly.
At the time, I didn’t have the language for it, I just knew my photos weren’t looking the way I wanted them to. Everything felt a little flat, a little “fine,” but not what I was seeing in other people’s work.
That changed the moment I picked up a Nikon AF-S 50mm f/1.8.
It wasn’t the highest-end lens, but it didn’t matter. Suddenly I had that depth, that separation, those creamy backgrounds I had been chasing without really understanding how to get them. That one lens shifted everything for me.
Around that time, I remember I also spent a lot of time figuring out white balance, which was probably one of the trickiest things to learn early on. That learning phase mattered far more than anything I could have upgraded gear-wise.
After years of shooting on the D3000, I upgraded to the Nikon D600, which at the time felt like a huge leap. That’s when I added lenses like the Sigma 35mm f/1.4 Art and a 70–200mm, and my work started to open up in a completely different way.
The D600 gave me more flexibility in low light and overall better image quality, but it was really the combination of that body and better lenses that made the difference.
Several years ago, I upgraded again to the Nikon Z6 II when I was doing more commercial work, especially product photography and interiors. That’s when I added a 24–70mm, which has become one of my go-to lenses.
It’s the kind of lens that just works in so many situations without overthinking it.
What’s interesting, though, is that even as the bodies changed, most of my lenses stayed.
I still use many of them today, sometimes with an adapter, which is another thing people don’t always realize. You’re not necessarily locked out of your older gear when you upgrade systems. There are ways to make things work and extend the life of what you already own.
At this point, I have a pretty well-rounded kit. I’ve added a few more creative lenses over time, like a fisheye and a Lensbaby just for play, and I think I have a 105mm tucked in there somewhere too. It’s not something I’d recommend as a first purchase, but it’s fun once you know what you’re reaching for.
Looking back, the biggest shifts in my work never came from upgrading my camera body.
They came from:
- choosing better lenses
- understanding light
- learning how to actually use the camera I had
And that’s the part I want you to take with you, because it’s really easy to think the next piece of gear is the thing that will change everything.
Most of the time, it isn’t.
I’m Building Something for Beginners
If all of this still feels like a lot, you’re not wrong.
There’s a point where piecing it together from blogs and videos gets frustrating, and you just want someone to walk you through it clearly.
I’m putting together a beginner-friendly photography course that breaks this down in a way that actually makes sense, from settings to lenses to editing and finding your style.
If you want to be the first to know when that’s ready, you can join the list here.
You don’t need the perfect setup to start
You need something solid, something you understand, and something you’ll actually use.
Camera & Lens Recommendations by Brand
If you don’t want to overthink this, pick a setup below and you’re in a really solid place. Every camera and lens listed here is compatible within its system, so you don’t need to worry about things not working together.
Please note: If you choose to purchase through these links, I may receive a small commission. I appreciate your support so I can continue to create useful content such as this blog post.
Nikon Setup
Bodies:
- Budget: Nikon Z50
- Higher: Nikon Z6 II (this is what I currently shoot with)
Starter Lens (Prime):
- Budget: Nikon Z 35mm f/1.8 S or the 50mm is actually a little more budget-conscious even
Versatile Zoom:
- Higher: Nikon Z 24-70mm f/2.8 S or the f/4 s is half the price but won’t give you quite the same beautiful background blur potential as being able to drop down into 2.8 aperture land. I opted for the f/4 but sometimes I do wish I had the 2.8. lol
Optional Zoom (Distance / Wildlife):
- Nikon Z 70-200mm f/2.8 VR S quite the investment but a really incredible lens
Sony Setup
Bodies:
- Budget: Sony ZV-E10
- Higher: Sony A7 III
Starter Lens (Prime):
- Budget: Sony FE 35mm f/1.8
Versatile Zoom:
- Higher: Sony FE 24-70mm f/2.8 GM
Optional Zoom (Distance / Wildlife):
Canon Setup
Bodies:
- Budget: Canon EOS R50
- Higher: Canon EOS R6
Starter Lens (Prime):
- Budget: Canon RF 35mm f/1.8 IS Macro STM
Versatile Zoom:
- Higher: Canon RF 24-70mm f/2.8 L IS USM
Optional Zoom (Distance / Wildlife):
Fujifilm Setup (Great for portability + color)
Bodies:
- Budget: Fujifilm X-T30 II
- Higher: Fujifilm X-T5
Starter Lens (35mm equivalent):
Versatile Zoom:
Optional Zoom (Distance / Wildlife):
Quick Note Before You Choose
If you’re stuck between options, don’t overcomplicate it.
Pick:
- a body that fits your budget
- one solid lens to start
You can build from there as you figure out what you actually enjoy shooting.
Memory Cards (What All Those Numbers Actually Mean)
Memory cards are one of those things that look simple until you try to buy one and suddenly you’re staring at a bunch of letters and numbers that feel way more complicated than they should be.
The good news is you don’t need to understand all of it. You just need to know what matters.
Storage Size (How Much You Actually Need)
This is the easy part.
You’ll usually see:
- 64GB
- 128GB
- 256GB
- 512GB
More GB means more photos and video.
If you’re just getting started, 128GB or 256GB is a really comfortable place to land. It gives you room to shoot without constantly worrying about running out of space, especially if you start shooting in RAW.
Speed Matters More Than People Realize
This is where things get confusing.
You’ll see things like:
- V30, V60, V90
- U1, U3
- numbers like 90MB/s, 170MB/s, 300MB/s
Here’s what actually matters:
V Ratings (Video Speed Class)
- V30 = solid for most photography and basic video
- V60 / V90 = more for high-end video work
For beginners, V30 is more than enough.
U Ratings (Older but still shown)
- U1 = slower
- U3 = faster
If you see it, just make sure it says U3 and you’re good.
MB/s (Transfer Speed)
This number usually shows how fast the card can transfer files, not necessarily how fast it writes while shooting.
Higher is nice, but it’s not the most important spec for beginners.
What Happens If Your Card Is Too Slow
This is the part people don’t realize.
If your card can’t keep up:
- your camera buffer fills up
- burst shooting slows down or stops
- video can lag or cut off
It’s not the end of the world, but it’s frustrating when you don’t know why it’s happening.
What I Recommend (Keep It Simple)
If you don’t want to overthink it:
- 128GB or 256GB
- V30
- U3
That’s it.
That combination will work for:
- portraits
- everyday shooting
- most beginner video
A Couple Reliable Options
These are widely used, reliable, and easy to find.
One Last Thing
Memory cards are one of the easiest places to try to save money, and also one of the easiest places to run into problems because of it.
You don’t need the most expensive option, but you do want something reliable.
It’s a small piece of your setup that quietly matters more than it seems.